Cold Plunge
DIY Cold Plunge: Convert a Chest Freezer
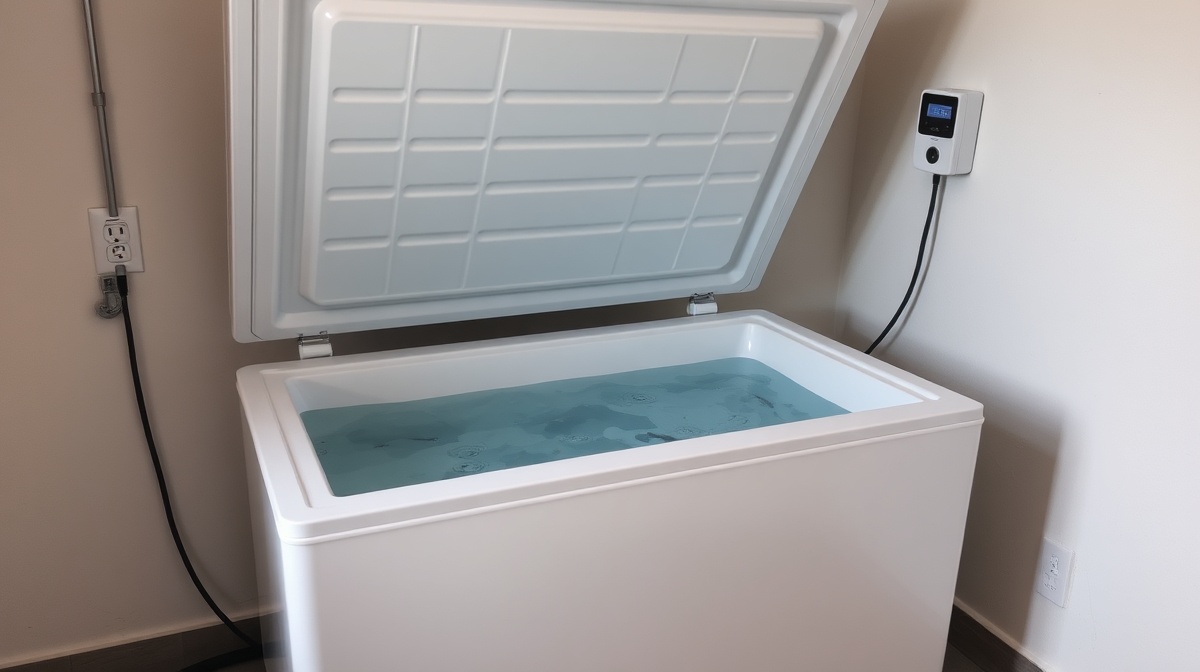
Step-by-step guide to converting a chest freezer into a cold plunge. Covers sizing, GFCI safety, sealing seams, temperature control, and water sanitation.
Disclosure We may earn a commission from links on this page, at no extra cost to you — and we only recommend gear we'd stand behind. How this works.
Inkbird ITC-308 Digital Temperature Controller
Best for Temperature control — the essential component for any chest freezer conversion
The single most important purchase in a DIY chest freezer build. Without it, your freezer will either freeze the water solid or cycle erratically. At approximately $35 as of July 2026, with a large community validation base, there's no good reason to skip it.
The good
- 2-stage control lets you set a precise target temperature with adjustable differentials
- Probe goes directly in the water; no guesswork
- Rated 10A / 1100W per spec sheet — sufficient for most 7–15 cu ft chest freezers
- Dominant recommendation across cold-plunge and homebrewing forums, with years of real-world use
- Straightforward setup — under 15 minutes for most builders
The catch
- Probe wire is not long — placement matters depending on freezer size
- No Wi-Fi or app connectivity; purely analog control
- At 10A / 1100W, you must verify your freezer's running amperage before connecting
Arctic King ARC070S0ARBB 7 cu ft Chest Freezer, Black
Best for Builders who want a new, right-sized freezer without hunting the secondhand market
A solid, appropriately sized base for a first build. Buy this if you want to skip the secondhand lottery and start with a known-good unit. Pair it with the Inkbird ITC-308 and you have the core of a functional plunge.
The good
- 7 cu ft hits the minimum recommended capacity for single-user cold plunge use
- New unit means known condition — no risk of pre-existing coil damage
- 4.3 stars across 3,200+ reviews as of July 2026
- Black exterior looks less utilitarian in a finished space
The catch
- Check interior footprint carefully — compressor hump reduces usable floor space
- No built-in drain port listed in specs; plan to use a submersible pump to empty
- On the smaller end; bigger builders or those wanting more immersion depth may prefer 10+ cu ft
Koolatron Deep Freezer Chest Freezer, 3.5 cu ft
Best for Reference only — to illustrate the front-drain feature worth prioritizing when sourcing any larger freezer
Do not use a 3.5 cu ft unit as a cold plunge. We include this only because its front drain is a useful feature to prioritize when choosing your actual freezer. A drain port matters more than you'll think after your fifth monthly refill.
The good
- Highest rating in this category at 4.7 stars / 2,400+ reviews as of July 2026
- Has a front drain port — a feature worth hunting for in any freezer you source
- Manual defrost keeps interior simpler
The catch
- 3.5 cu ft is far too small for full-body immersion — only a seated, folded position is possible
- Price not listed; verify before purchasing
Plunge Chill Cold Plunge Chillers & Bundles
Best for Value-focused buyers who want a direct-brand chiller or chiller-plus-tub bundle without sourcing and assembling separate parts
For buyers who want to avoid the build entirely, Plunge Chill is the most cost-comparable direct-brand option to a DIY conversion. The pricing is genuinely competitive. But it's a newer brand — treat specs as manufacturer claims until independent reviews accumulate.
The good
- Chillers listed from ~$499 as of July 2026; chiller + Pod tub bundles from ~$569 — competitive with DIY all-in build costs
- 1 HP option available for faster temperature pull-down
- All-in-one system skips sealing, wiring, and sanitation setup
- Direct-to-consumer pricing cuts out retail margin
The catch
- Newer brand — no independent long-term reliability data yet
- Manufacturer does not publish detailed specs publicly; verify wattage, minimum temperature, and dimensions directly with the brand before purchasing
- No star rating or review volume available to evaluate at time of writing
A used chest freezer plus an Inkbird ITC-308 can come in under $300 if you source smart. Commercial units with built-in chillers routinely run $2,000–$5,000+. Strip away the aesthetics and the warranties, and you’re left with one job in both cases: hold water at a precise, repeatable temperature. Both do that. What separates a working DIY build from a failed one isn’t the wiring — it’s a skipped sealing step and a missing GFCI outlet.
What size chest freezer do you actually need?
Body volume is the hard constraint. A fully submerged adult displaces a substantial amount of water — the cold-plunge community, via years of documented builds, has landed on a minimum of 7 cubic feet (approximately 200 liters) of interior capacity for single-user immersion. Builders consistently report this as the floor, not a comfortable starting point. Many prefer 10–15 cu ft when space allows; more water mass holds temperature more stably through a session, which matters when you’re climbing in and out repeatedly.
Note on displacement figures that circulate in forums: they are rough practical estimates based on community observation, not citable measurement studies. The specific number is less important than what it implies — you need meaningful headroom above displacement or you’re plunging in a puddle.
Anything under 7 cu ft is simply not usable for full immersion. Compact 1.1 and 1.8 cu ft uprights are out entirely. The 3.5 cu ft chest models are marginal at best — builders report that fitting an adult requires an uncomfortable, half-seated position even under ideal circumstances.
One spec to scrutinize before buying: you need a flat, unobstructed interior bottom. Many modern chest freezers have a compressor hump on one side that eats usable floor space. The Midea MRC070S0AWW and the GE FCM7SKWW are two frequently sourced 7 cu ft models. According to their respective manufacturer product pages (Midea US and GE Appliances), the MRC070S0AWW lists approximate interior dimensions of 36″ × 20″ × 18″ and the FCM7SKWW lists approximately 38″ × 21″ × 17″ — but neither spec sheet tells you where the hump sits or how much floor area it actually consumes. Measure the usable footprint yourself, or ask the seller for interior photos before committing. Per community build reports, the hump on the Midea sits in one rear corner and is reported as manageable for most adults; the GE’s is reported as slightly larger — but verify this yourself before purchasing.
The GFCI requirement — this is non-negotiable
Electricity near water is not a situation where you improvise. The NEC (National Electrical Code, Article 210.8) requires GFCI protection for receptacles in areas where water is present — garages, outdoors, bathrooms. A chest freezer cold plunge draws current at steady state, but any fault condition near water is life-threatening without a ground-fault circuit interrupter.
Every outlet in your setup must be GFCI-protected. The outlet the freezer plugs into and, separately, the outlet for the temperature controller. If your space doesn’t already have GFCI outlets, have a licensed electrician install them. Non-negotiable spending.
Keep all electrical connections — the temperature controller, any pump, any filtration — elevated above water level and protected from splashing. Extension cords used outdoors must be rated for outdoor use.
How to seal the interior
Chest freezer interiors are galvanized steel or aluminum with seams at the corners. Those seams can leak if untreated, and standing water accelerating oxidation is a real, cumulative concern. This is where many builds run into problems — not the wiring, not the temperature control. The sealing step.
Here’s what builders across the r/coldplunge community consistently describe as working:
- Sand interior seams and corners with 60–80 grit sandpaper until you see dull, scuffed metal — not shiny, not painted-looking. You’re creating mechanical tooth for the epoxy. The surface should feel rough to the fingertip.
- Clean thoroughly with isopropyl alcohol. Let it dry completely. Not mostly — completely.
- Apply JB WaterWeld to the corners and seams. Work it in, smooth it, and respect the cure time: per the J-B Weld product page, the putty has a 25-minute work time and 60-minute initial set, with full strength at 24 hours. Many builders report multi-year hold without re-application when the prep is done correctly.
- Some builders add a second layer of food-safe silicone sealant over the cured epoxy, particularly at the lid gasket junction — worth considering if longevity is a priority.
Do not sand or drill into the walls or floor. Refrigerant coils run through the walls — and in many models through the floor — and puncturing one destroys the unit outright. In older R-22 units, there is an environmental hazard on top of that. Locate the coils before you touch anything structural.
Temperature control: why you need a standalone controller
A stock chest freezer thermostat is calibrated for 0°F food storage. It doesn’t know you want 52°F water — left alone, it will freeze everything solid or cycle erratically, nowhere near the 45–55°F range that’s actually useful. An external temperature controller with a water probe is what closes that gap.
The Inkbird ITC-308 is the standard recommendation across cold-plunge and homebrewing communities. Plug your freezer into the cooling outlet, drop the probe in the water, set your target temperature, and the controller cuts power when water hits that target — then restores it when temperature drifts past the set differential. Most builders target 50–59°F / 10–15°C. Setup takes under 15 minutes.
As of July 2026, its Amazon listing puts it at approximately $35. At that price, it’s genuinely one of the more unusual value propositions in this build — a modest component that makes the entire thing work. It has been the dominant recommendation in r/coldplunge threads for years. One important check: per its spec sheet, the ITC-308 is rated at 10A / 1100W — verify your specific freezer’s running amperage on its nameplate before connecting.
Water sanitation — the part most guides skip
At 50°F, microbial growth slows considerably compared to a warm tub, but it does not stop. Builders who run their plunges without any sanitation consistently report visible cloudiness and biofilm within a few weeks.
Two approaches come up most often in community discussions. An ozone generator — a small submersible unit, usually paired with a recirculating pump — is the lower-maintenance option. Ozone breaks down to oxygen and leaves no chemical residue. Food-grade 3% hydrogen peroxide is cheaper upfront and degrades harmlessly, but it requires active monitoring. Based on general community discussion rather than any formal survey, some builders who’ve run both appear to settle on ozone for day-to-day use — but that is an observed pattern, not a documented consensus.
Drain and refill at minimum once a month regardless of which approach you use. A submersible pump or a freezer with a front drain port makes this far less tedious.
What about a dedicated chiller instead of converting?
If the build feels like too much, or if you want something that heats the water, filters it continuously, and doesn’t look like a repurposed appliance, a purpose-built chiller is worth pricing directly.
Plunge Chill is one option in this category. According to their product collection page (plungechill.com/collections/cold-plunge-chiller, last checked by our team for this article), chillers are listed starting around $499 as of July 2026, with a chiller-plus-Pod-tub bundle around $569 and a 1 HP option available for faster pull-down. That pricing sits well below established competitors in the $2,000+ segment. The brand is newer, and we have not found independent long-term reliability reviews at time of writing. Detailed specs — wattage, minimum temperature, exact dimensions — are not prominently published; confirm directly with the brand before ordering.
The realistic cost breakdown
A DIY build using a new 7 cu ft chest freezer, an Inkbird controller, sealant, and basic sanitation typically runs $400–$650 based on component pricing as of July 2026. Source a used freezer in good condition and you can push that below $300.
The real hidden cost is time — specifically, cure time. The build itself spans a weekend, but the bottleneck is clear: JB WaterWeld needs a full 24 hours to reach rated strength per the manufacturer’s product page. Sand and seal Saturday morning, and you can’t fill until Sunday at the earliest. Everything else — mounting the controller, running the probe, first fill — takes a few hours at most.
Start with the DIY build. If it doesn’t stick after three months, you’re out $400–$650, not $3,000. A commercial chiller-tub bundle skips all of the above and usually includes filtration, but adds $1,500–$4,000 or more to the bill.
Safety summary before you start
- GFCI outlet protection on every circuit. No exceptions, per NEC Article 210.8.
- Never drill or sand into freezer walls or floor — locate the coils first.
- Full cure time on all sealants before adding water. JB WaterWeld requires 24 hours for rated strength per the manufacturer.
- Keep all electrical connections elevated and protected from splashing.
- Don’t plunge alone if you’re new to cold immersion. If you have any cardiac history or health concerns, consult your doctor before starting. Research suggests significant cardiovascular responses occur at or below 15°C (59°F) — the temperature range this build targets. Esperland et al. (2022), published in PLOS ONE (DOI: 10.1371/journal.pone.0276525), conducted a meta-analysis of cold immersion studies and documented these physiological responses. This is not medical advice; discuss your individual situation with a qualified healthcare provider before use.
- Stagnant water is a microbial environment. Sanitize consistently; drain and refill monthly.
Frequently asked questions
What temperature should a chest freezer cold plunge be set to?
Most cold plunge practitioners target 50–59°F (10–15°C). Research suggests that immersion at or below 15°C (59°F) is associated with significant physiological responses — Esperland et al. (2022), published in PLOS ONE (DOI: 10.1371/journal.pone.0276525), conducted a meta-analysis of cold immersion studies documenting these effects. This is not medical advice; consult a healthcare provider before starting, especially if you have any underlying health conditions. With an Inkbird ITC-308, you can dial in any target in that range precisely. Beginners often start closer to 55–59°F and work down over weeks.
How do I keep the chest freezer cold plunge water clean?
The two main approaches are a small submersible ozone generator (paired with a recirculating pump) or periodic addition of food-grade hydrogen peroxide. Cold water slows microbial growth, but doesn't stop it. Most experienced builders recommend a full drain and refill at minimum once a month, more frequently if the plunge gets heavy use. A front-drain freezer or a submersible pump makes this much less painful.
Can I use any chest freezer, or does it need to be a specific type?
The hard minimum is approximately 7 cubic feet (roughly 200 liters) of interior volume for single-user full immersion. Beyond size, confirm the interior has a flat bottom with usable footprint — some models have large compressor humps. The Midea MRC070S0AWW and GE FCM7SKWW are two commonly sourced 7 cu ft options; community reports suggest both have humps in manageable positions for most adults, but verify this before purchasing. Manual defrost models are generally preferred because auto-defrost cycles can interfere with temperature stability. Most importantly, never drill or sand into the walls or floor — refrigerant coils run through them.
Do I need an electrician for a DIY chest freezer cold plunge?
If your garage, outdoor space, or intended location already has GFCI-protected outlets, you may not need professional help for the electrical side. But if the area lacks GFCI protection — which is required by the National Electrical Code (Article 210.8) wherever water and electricity are near each other — you need a licensed electrician to install it. This is not optional. The cost of a GFCI outlet installation is minor; the risk of a fault condition near water without one is not.
How much does it cost to build a DIY chest freezer cold plunge?
Based on component pricing as of July 2026, a build using a new 7 cu ft chest freezer plus an Inkbird temperature controller, sealing materials, and basic sanitation typically runs $400–$650. Sourcing a used freezer in verified good condition can push the total below $300. Any electrical work (GFCI installation) adds cost depending on your setup. Compare that to commercial cold plunge units, which regularly start at $2,000 and run well past $5,000 for chiller-equipped models.
Sources
- Inkbird ITC-308 Product Listing and Specification Sheet — Inkbird / Amazon
- Arctic King ARC070S0ARBB 7 cu ft Chest Freezer Product Listing — Arctic King / Amazon
- Koolatron 3.5 cu ft Chest Freezer Product Listing — Koolatron / Amazon
- Plunge Chill Cold Plunge Chillers Collection — Plunge Chill
- NEC Article 210.8 — Ground-Fault Circuit-Interrupter Protection for Personnel — National Fire Protection Association (NFPA)
- Esperland et al. (2022): Health effects of voluntary exposure to cold water — a continuing subject of debate (DOI: 10.1371/journal.pone.0276525) — PLOS ONE
- J-B Weld WaterWeld Epoxy Putty Product Page — J-B Weld
- Midea MRC070S0AWW 7 cu ft Chest Freezer Product Page — Midea
- GE FCM7SKWW 7.0 cu ft Manual Defrost Chest Freezer Product Page — GE Appliances